Guide
Today we're going to learn how to make a simple set of horns, but you're being taught by someone who doesn't know how it's properly done :v
This assumes you have Blender v4.0.1 or similar, and at least know how to open the window o.o
Today we're going to learn how to make a simple set of horns, but you're being taught by someone who doesn't know how it's properly done :v
This assumes you have Blender v4.0.1 or similar, and at least know how to open the window o.o

When you open up a new Blender project, you'll see something like this! The "scene" contains a cube, a camera and a light
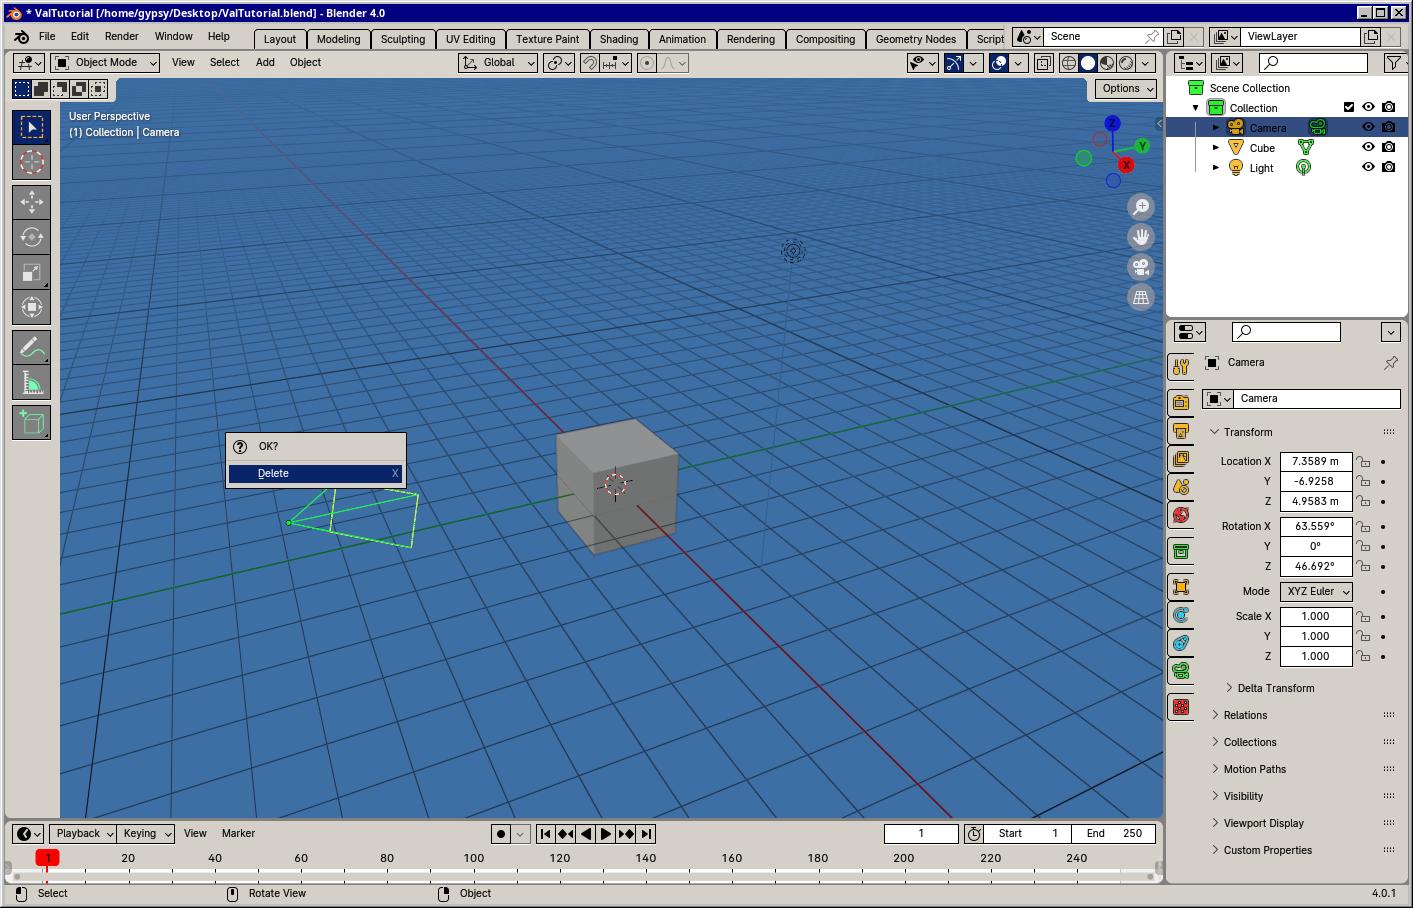
Left-click to select the camera and press X to delete it. A little window pops up to confirm. You can left-clickthat. Do the same thing for the light and the cube until there's nothing left.

To create an object, press shift+a while your mouse is in the viewport. Navigate to Mesh>Cube to create a brand new cube

You can focus the cube by left-clicking it and pressing numpad-., from there, you can spin the camera around by holding down middle-click or zoom with the scroll wheel and also pan the camera with shift+middle-click
The camera can also be rotated using the numpad numbers.
The camera can also be rotated using the numpad numbers.
Top
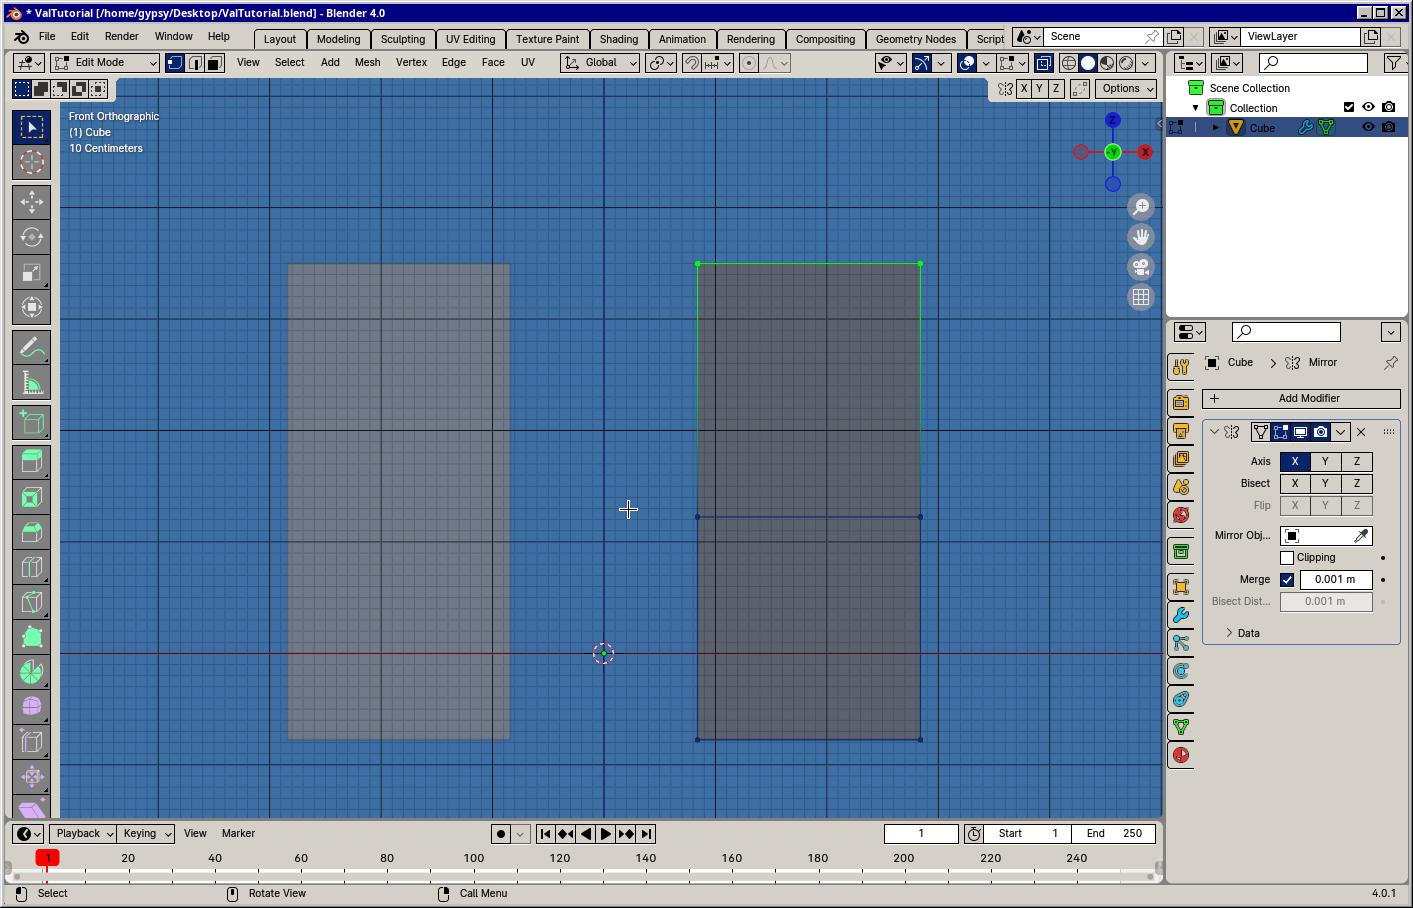
From the front of the cube we're going to select the cube and switch to edit mode. Earlier we were in object mode which is for dealing with the entire scene. Edit mode is for dealing with just that the selected object. You can see which mode we're in by looking up to the top left
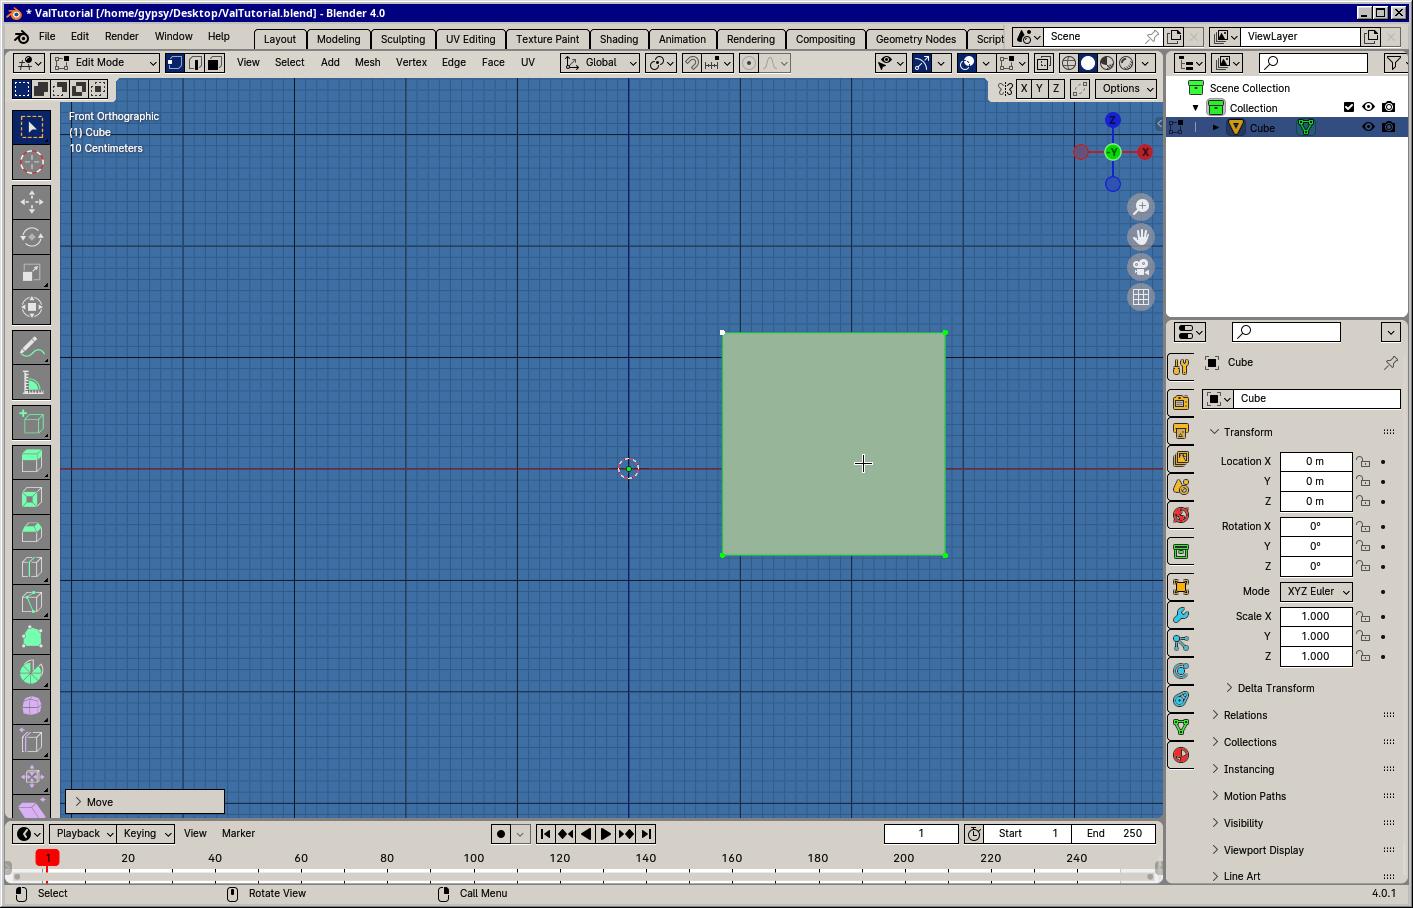
From here we're going to press the A key to select all things. Things are different in each context- pressing A in object mode selects all visible objects and in edit mode it selects all points. With all the points selected, press the G key to move them all to the right somewhere. This will move the points along the X/Z axis
Top
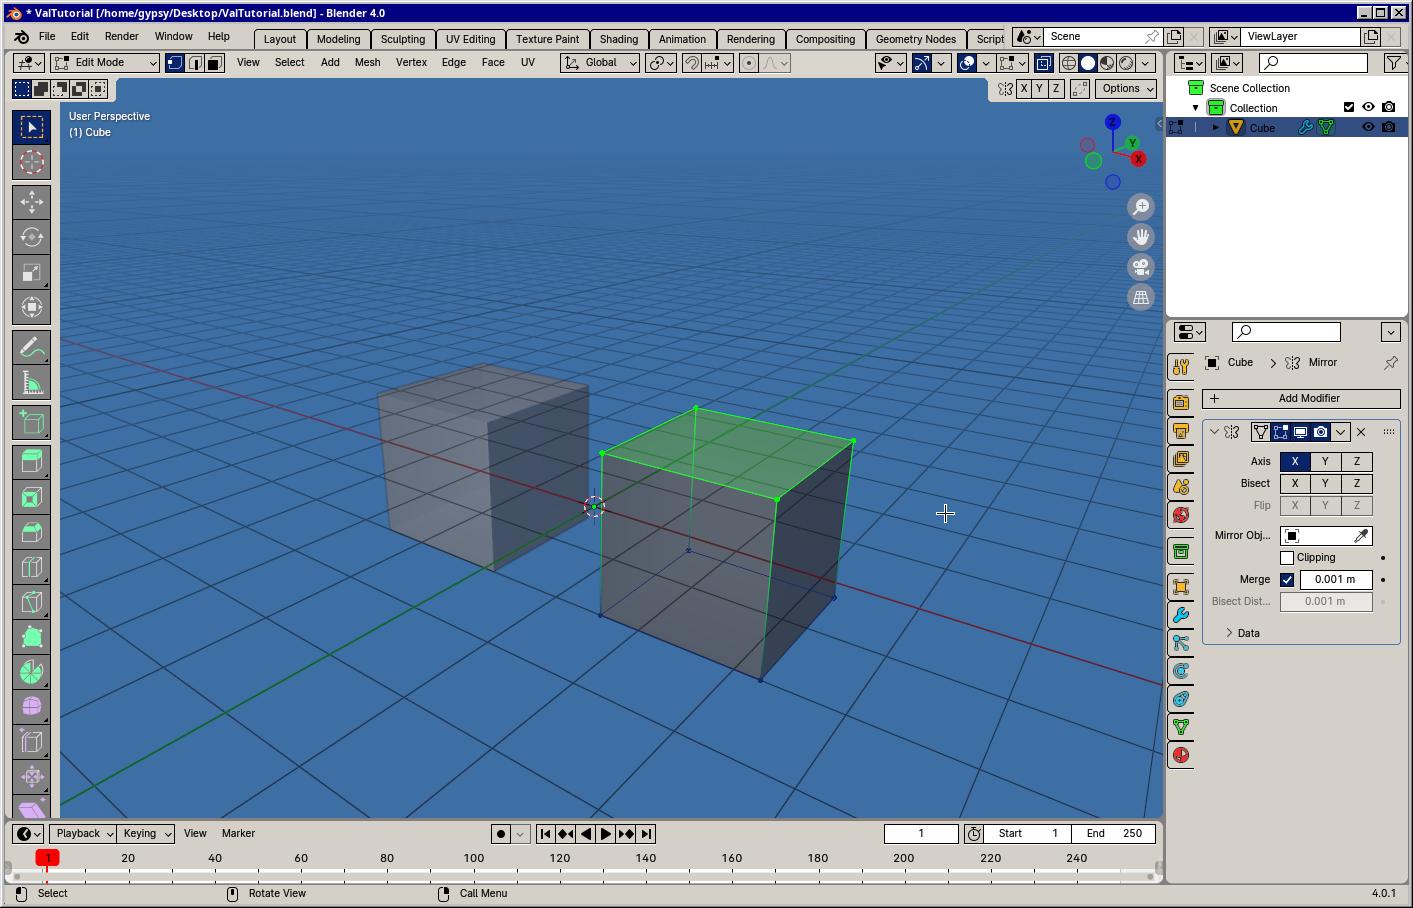
Over on the right sidebar there's a little spanner icon called "Modifiers". Modifiers let us stack effects and operations to objects without changing the underlying object. The term for this is Non-destructive. We can have a whole bunch of modifiers active and only when we apply them do they actually get performed onto the object. Otherwise it's more of a preview

Click on the Add Modifier button and search for Mirror. The mirror modifier allows us to reflect the object against whichever axis we want (by default this is the X axis). The point of reflection is usually a little dot that by default is at the origin, or <0,0,0> of the scene
You'll see if we left-click one point and press G to move it, it happens to the other cube! You can undo changes with Ctrl+Z

You can toggle "X-ray mode" by pressing Alt+Z. This lets you see though objects and even select points that you normally wouldn't be able to see. Do this and select the top four points. You can confirm this by using middle-click to look around
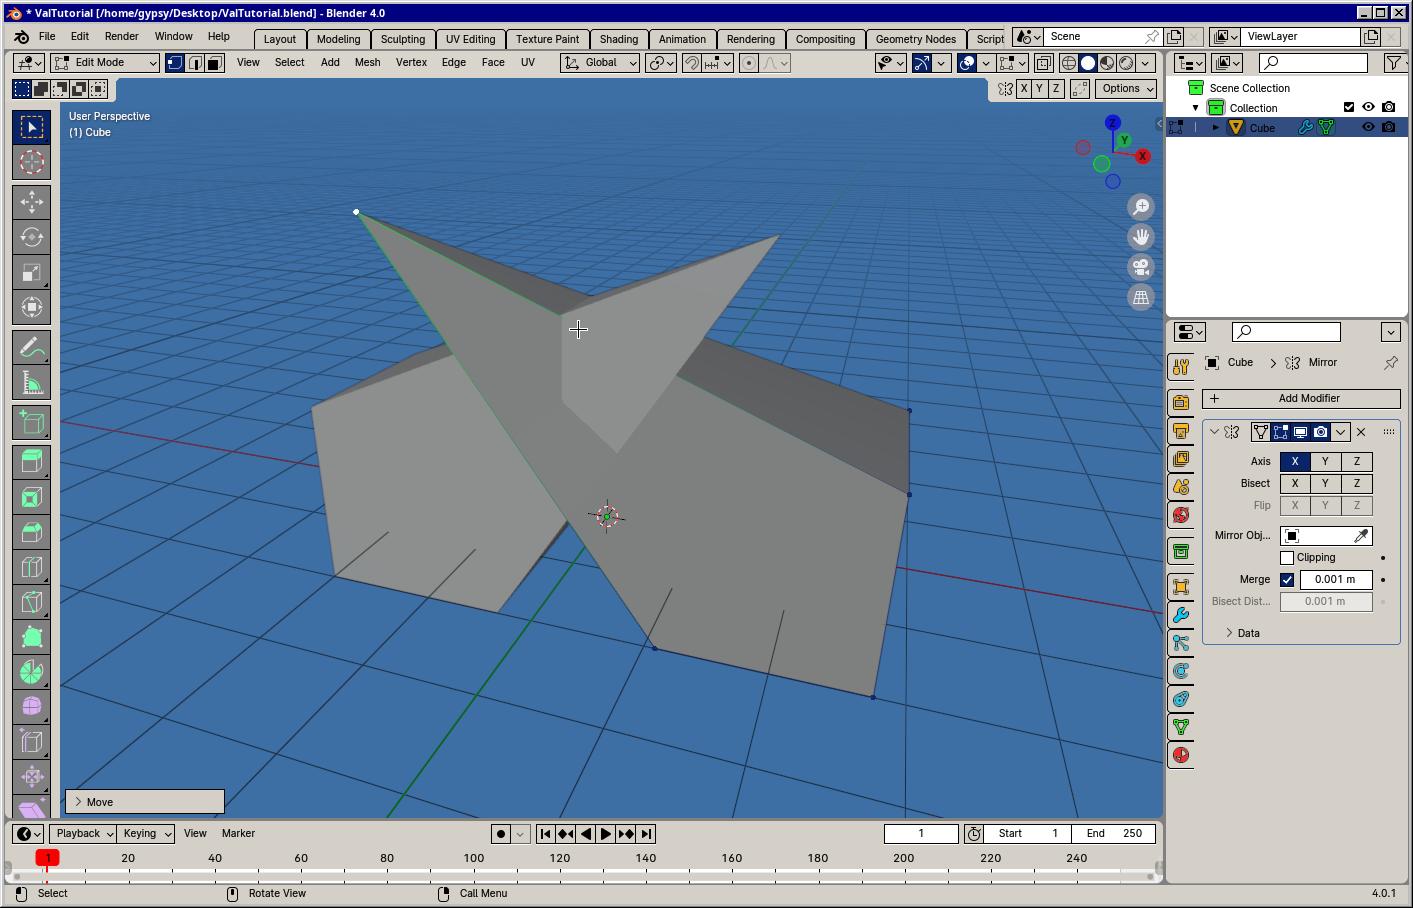
Now we'll try adding more points. With the top four points selected we can press the E key to extrude. Pressing it then moving the mouse will move four new points that have been creased form the previously selected ones. Left clicking places them
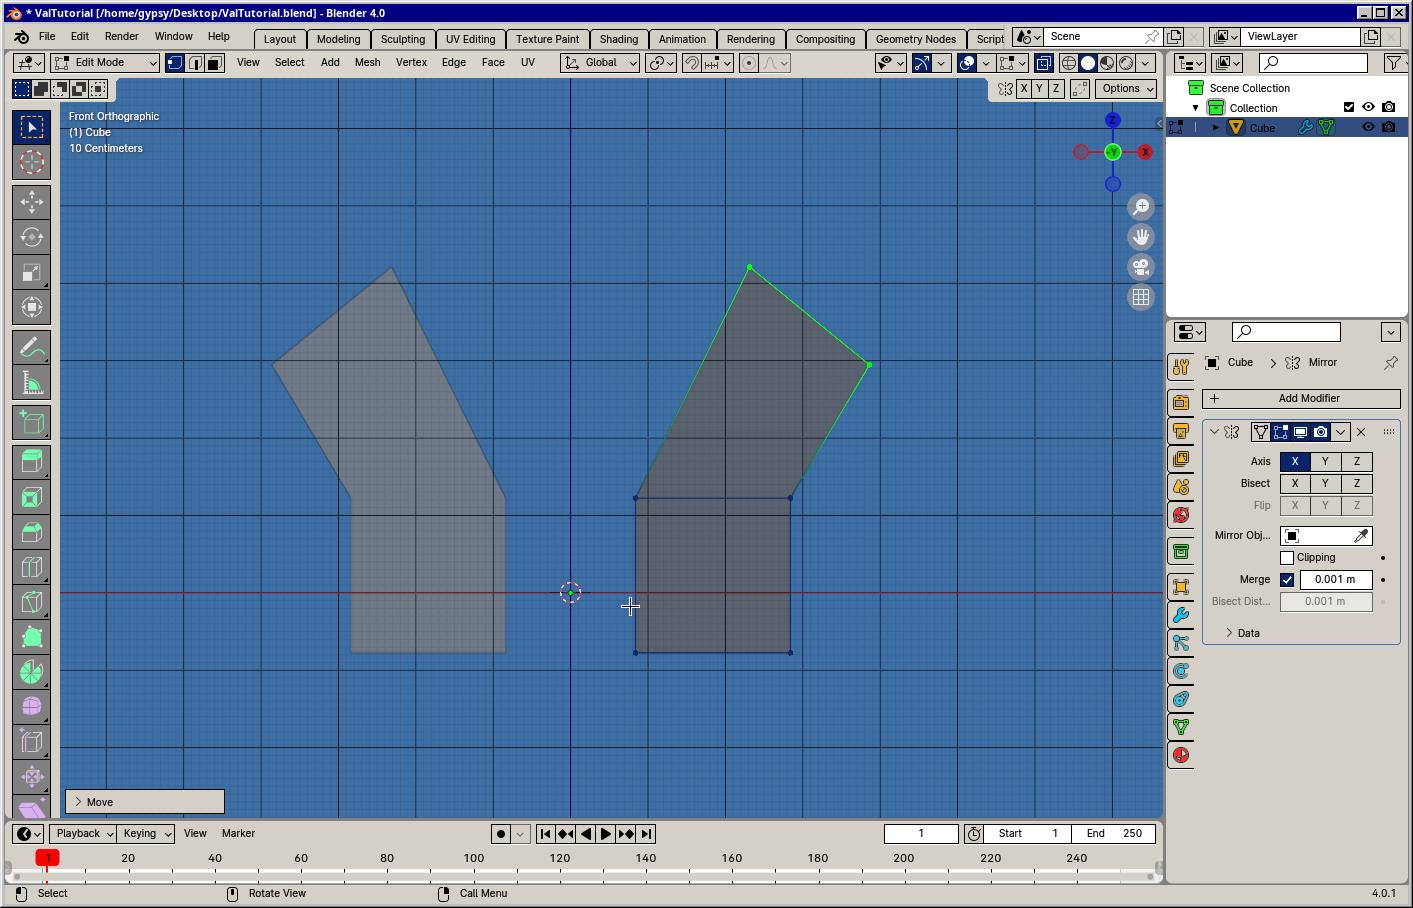
Try rotating (R) and moving (G) the new points
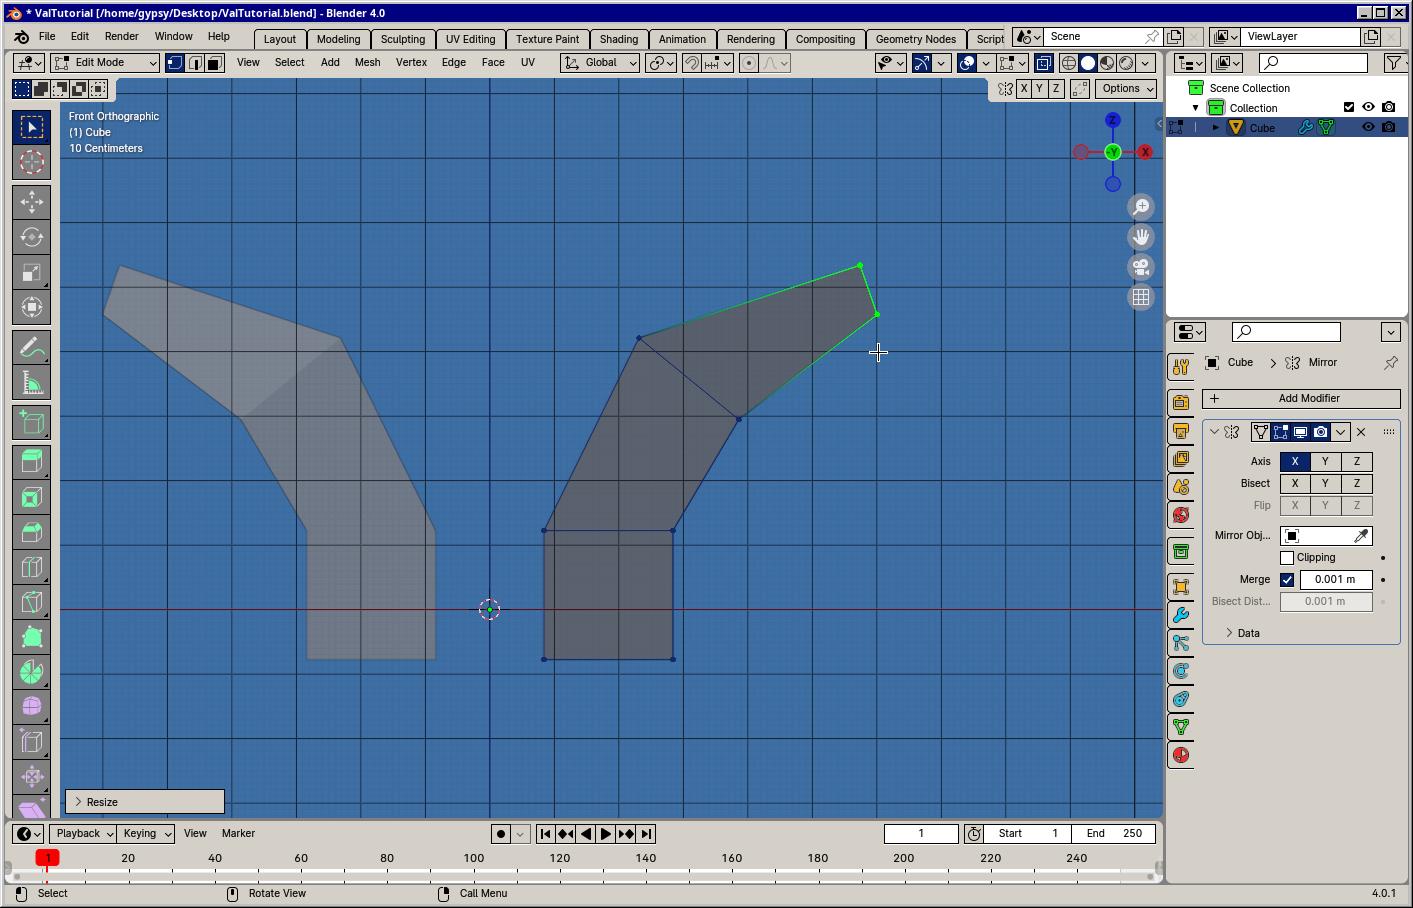
And extruding one more time, this time try scaling (S) it down too

Cool! Press Tab to get back to object mode and Alt+Z to turn off X-ray. Now you should have something like this :D
TopNow we're going to try some subdivision. What subdivision does is smooth out our points by adding some in between, multiplying complexity
Remember that modifiers don't truly affect the object until they're applied

Go to the modifier tab in the right sidebar (The spanner looking icon) and find the subdivision modifier. It'll make your object look like the above, and you can even see the original points when you tab into edit mode
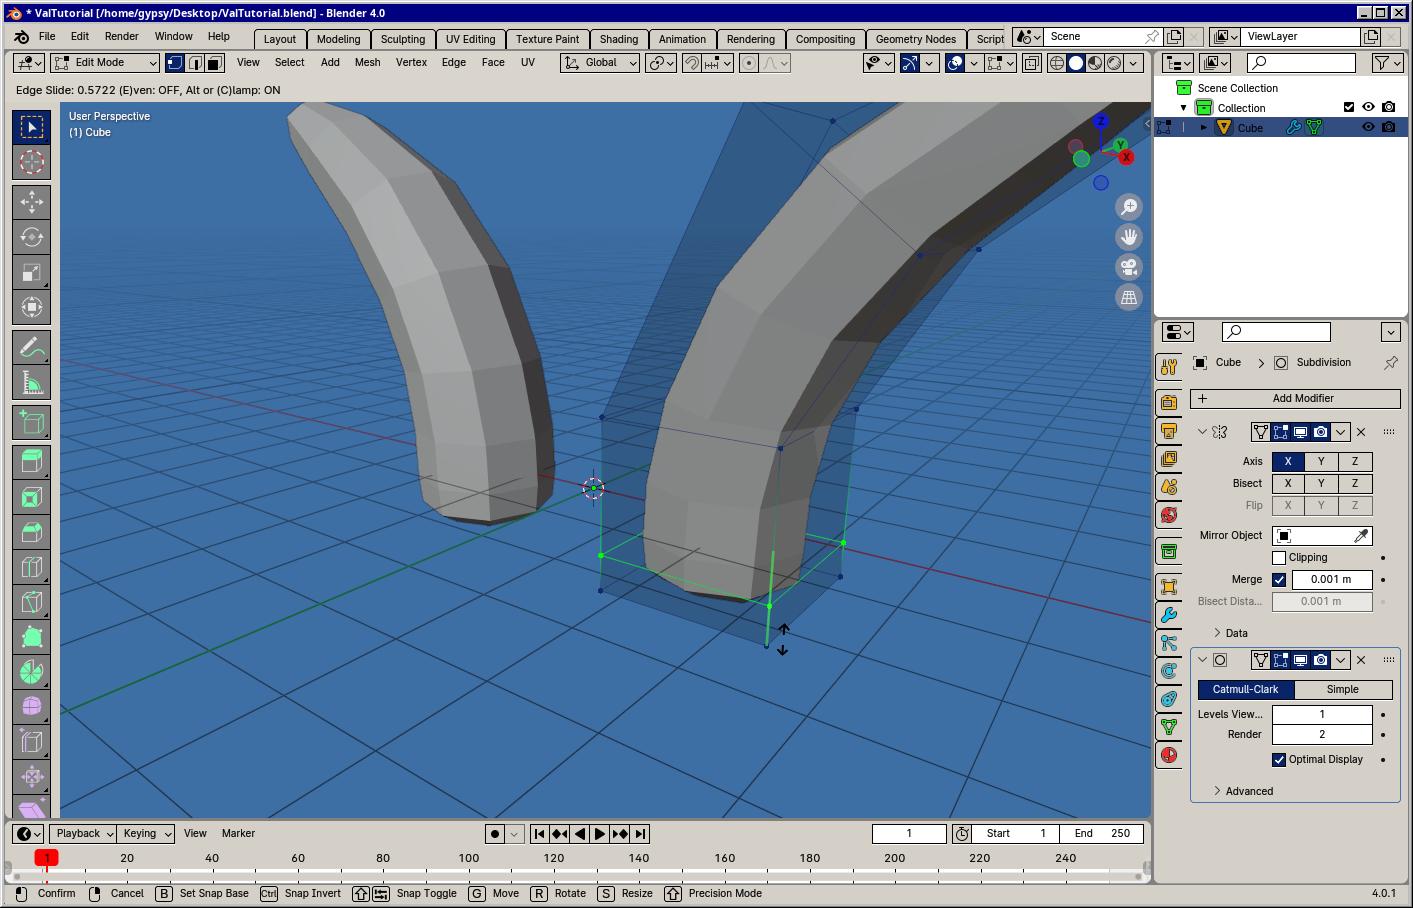
I'd like to make the bottom of the object look flatter, so I'm going to make a loop cut. Pressing Ctrl+R and mousing over spaces between points highlights where a new set of points will end up. Left-clicking selects that area and left-clicking again confirms. Before the second click you're able to slide the points down. I slid mine down closer to the bottom otherwide it'll be in the middle by default
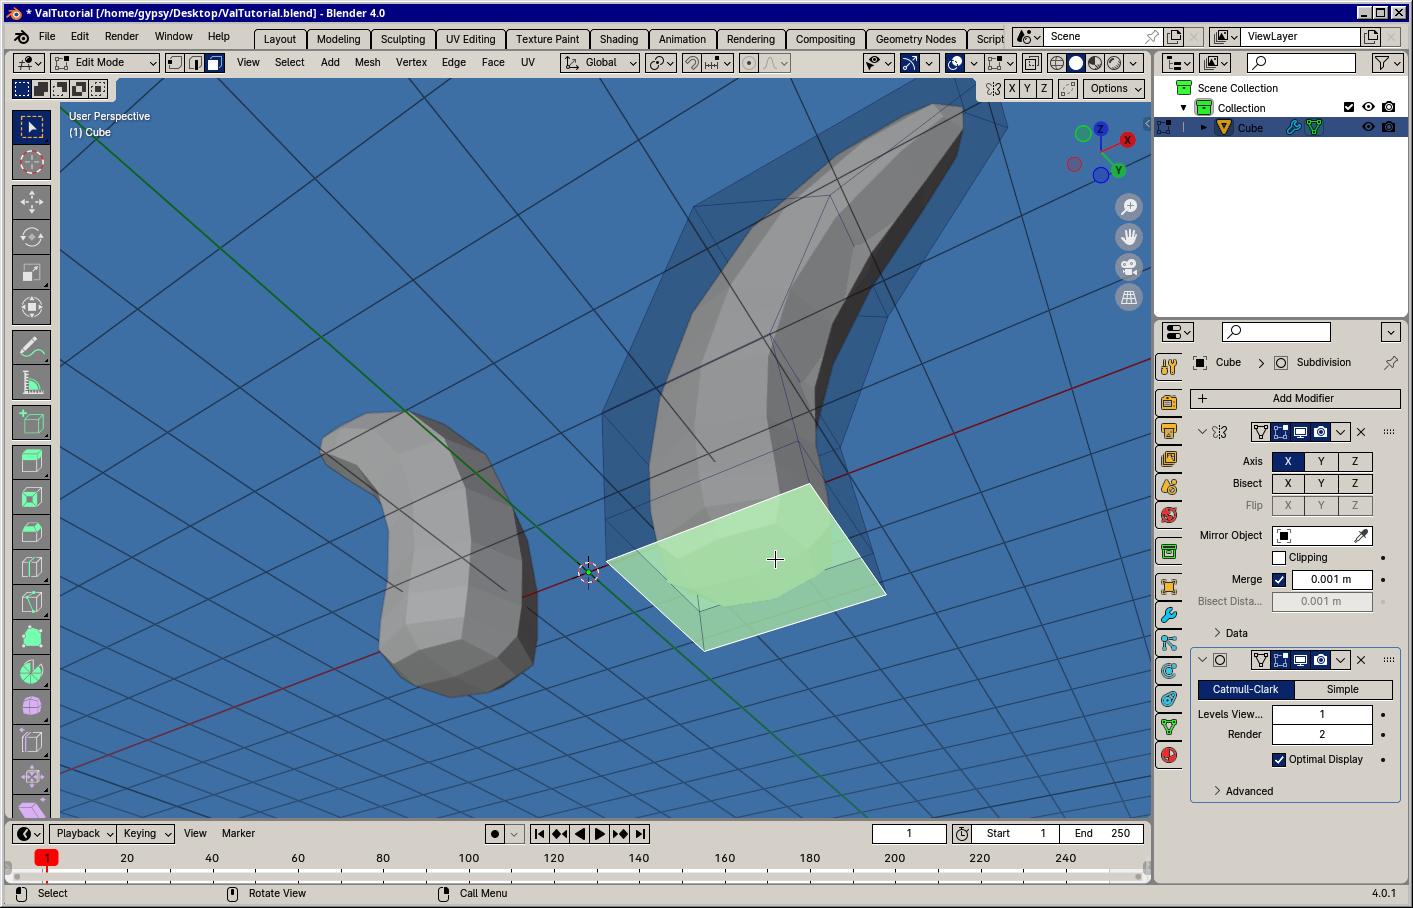
The horns won't need a bottom, so we're going to delete it. By pressing 1,2 or 3 the edit mode will change what is selectable

By pressing 3 you can select faces, then select the bottom face and press X to delete. A window pops up asking what parts you want to delete. I don't want to delete the points or edges, only the face they contain. So I select the face option

In object mode you can make an object smoother by selecting it, then right-clicking it and selecting the shade smooth option. By default most objects are shaded flat to begin with

There's a few ways you can select points, edges and faces
Play around a bit! Move points around, scale up faces or loops of points, rotate them how you want or even extrude some more!
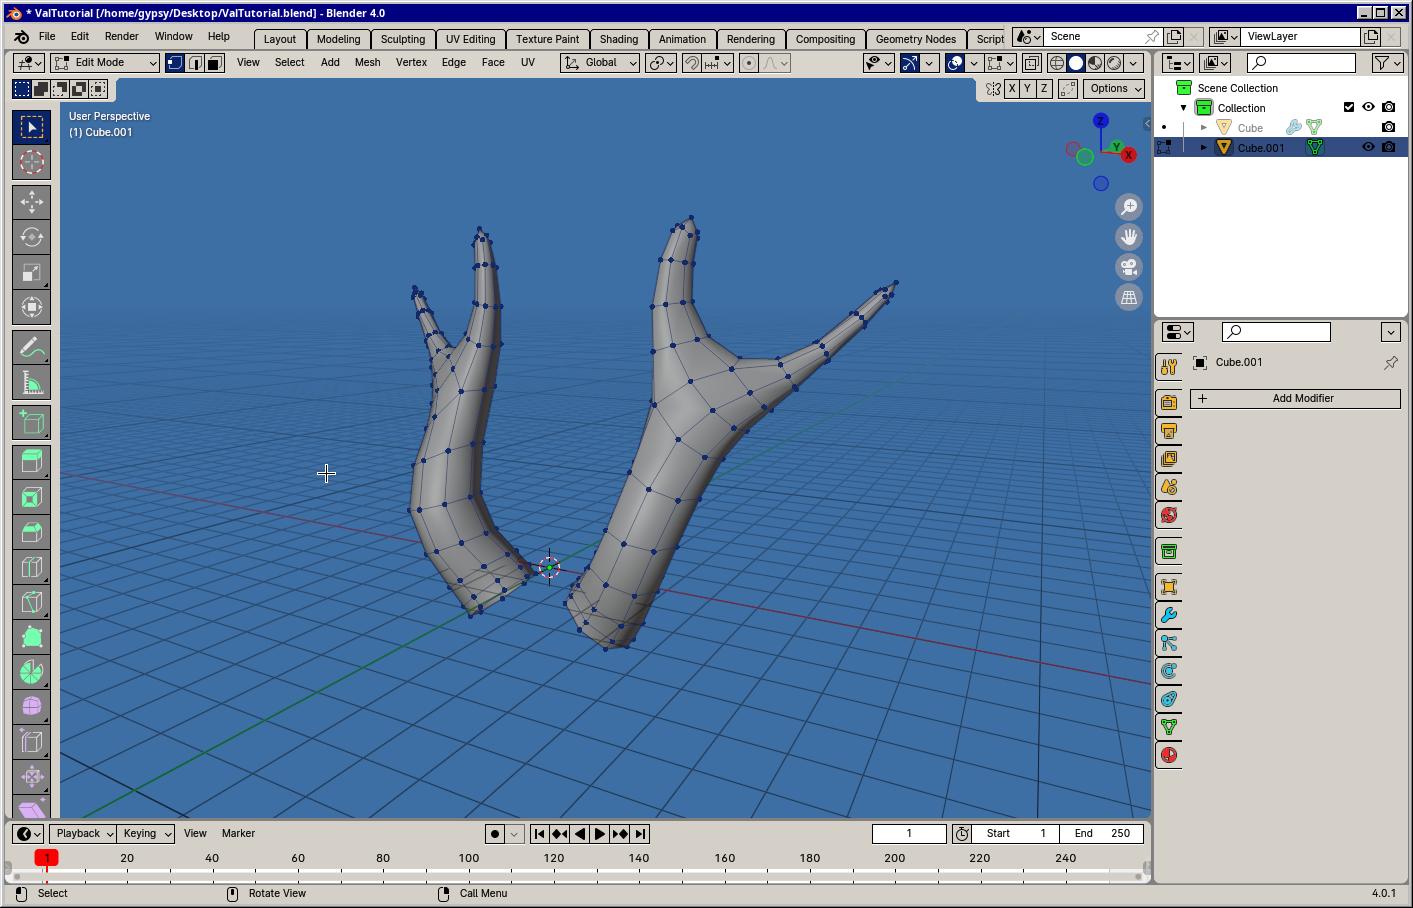
TopIf you're like me, you'll want to have one object with all the modifiers still stacked up, and another object with them applied

Selecting an object then pressing Shift+D will Duplicate an object and move it wherever the mouse goes. You can Middle-click to force movement along an axis. Right-clicking will place it at the same place as the original, otherwise left-click to apply where it is

Up the top of the sidebar is the Scene Collection. You can see that we have both Cube and Cube.001 where the latter is the fresher object. You can hide objects or folders of objects using the eye icon to the right. Now I can select the copy knowing that I can fuck up all I want and I'll still have the original horns as a backup
To apply the modifiers we have on the copied horns. You mouse over the modifier and press Ctrl+A to apply them. You can see these changes taking effect once we tab back to edit mode
TopHow to export this for Second Life

With the "finished" object here, we can simply go to File>Export>Collada
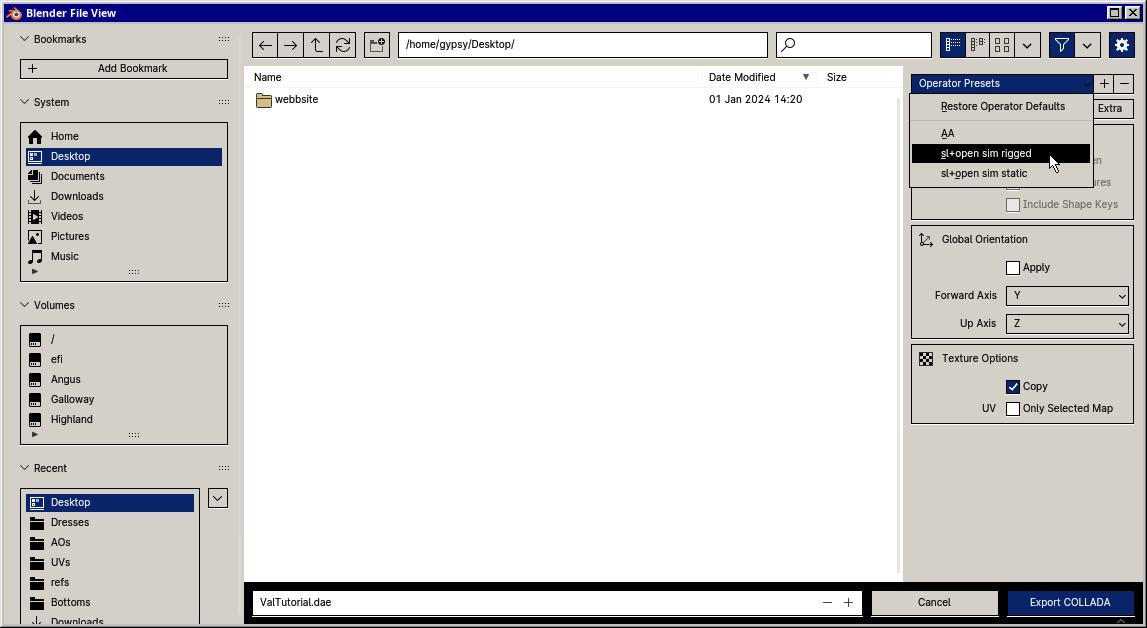
Blender should have a preset for SL/Opensim unrigged. Save it then upload it into SL~
Top